Customize your TFS build process to run StyleCop
This will be a short guide on how to get StyleCop to run for every check-in as a part of your build process in TFS or VisualStudio Online. You may also integrate stylecop with the project’s MSBuild file, see StyleCop docs for how to do so.
Start off by downloading and installing StyleCop and TFS build extensions.
Build controller changes
First you’ll need to set the custom assemblies path for your build controller. I created a new folder Custom Assemblies in the BuildProcessTemplate folder directly under the team project root folder. Also download a copy of the default template.
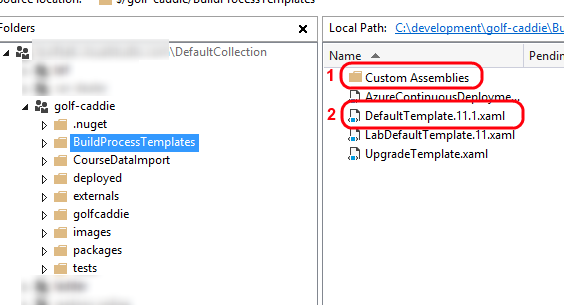
Add the following assemblies to Custom Assemblies:
- StyleCop.dll
- StyleCop.CSharp.dll
- StyleCop.CSharp.Rules.dll
- TFSBuildExtensions.Activites.dll
- TFSBuildExtensions.Activites.StyleCop.dll
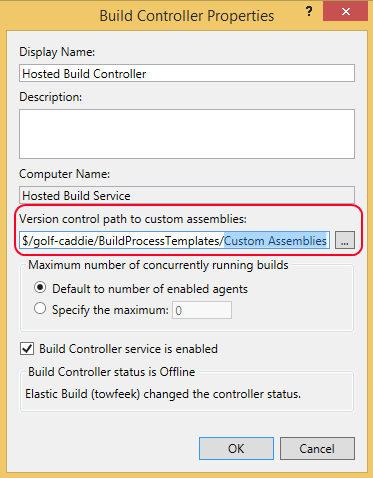
Next Manage Build Controllers and set Version control path to custom assemblies to your Custom Assemblies folder from Build Controller Properties.
Custom Build Templates
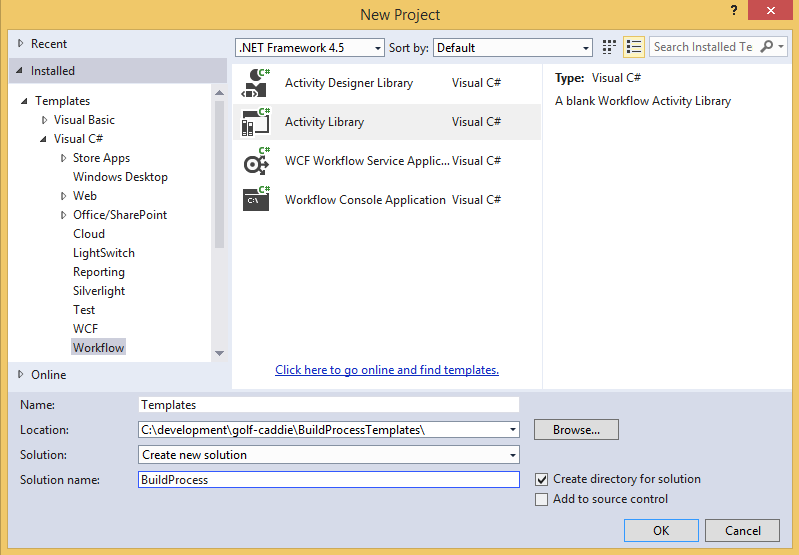
Create a custom build process solution with a Workflow Activity Library project. I created a BuildProcess solution in the BuildProcessTemplates folder and named the workflow project Templates.
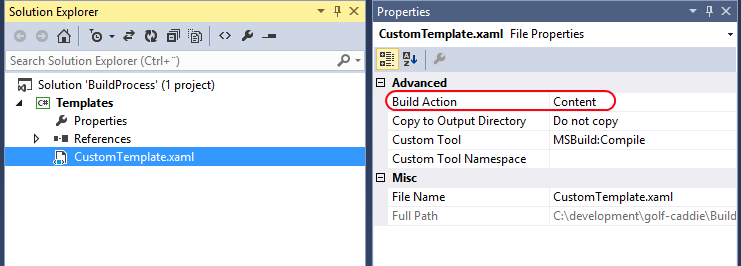
Next rename the DefaultTemplate.11.1.xaml template you downloaded earlier to CustomTemplate.xaml and add it to the project. Make sure you set the Build Action to Content.
Now let’s add the StyleCop activity to the Toolbox window. Add a new tab TFS Build Extensions, right-click and select Choose items. Browse to the assembly TfsBuildExtensions.Activites.Stylecop.dll and click OK.
We want to run StyleCop early in the build process for the build to fail quickly if there are any violations, the first place where StyleCop can be executed is after the Initialize Workspace sequence within the Run on Agent sequence.
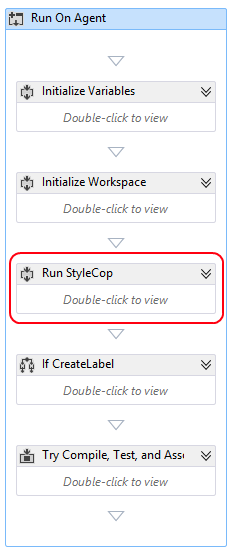
Add a new sequence activity right after Initialize Workspace and name it Run StyleCop. Add the following variables with a scope of the Run StyleCop sequence.
- StyleCopFiles – IEnumerable<string>
- StyleCopSettingsFile – string
- StyleCopResults – bool
- StyleCopViolations – Int32
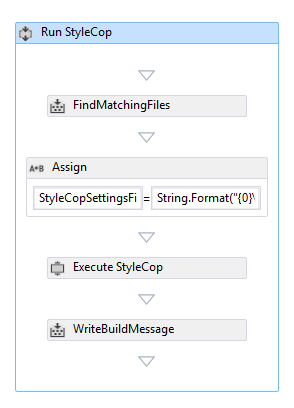
Now add the following activities:
- FindMatchingFiles – Set the result to StyleCopFiles and the MatchPattern to String.Format(“{0}\**\*.cs”, BuildDirectory)
- Assign – Set the StyleCopSettingsFile variable to String.Format(“{0}\Settings.StyleCop”, SourcesDirectory)
- StyleCop – Set the following properties
- SettingsFile to StyleCopSettingsFile
- SourceFiles to SyleCopFiles.ToArray()
- Succeeded to StyleCopResults
- ViolationCount to StyleCopViolations.
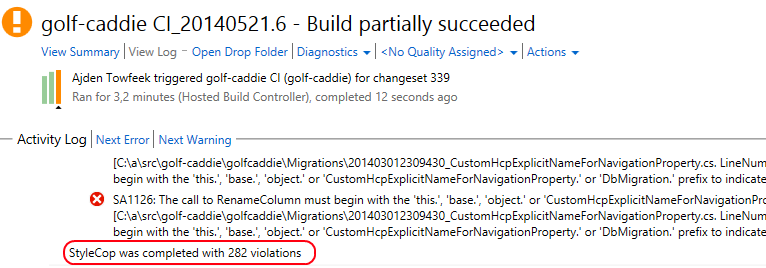
- WriteBuildMessage – Change the Importance level to High and format the message to something like String.Format(“StyleCop was completed with {0} violations”, StyleCopViolations)
My final sequence activity looks like this:
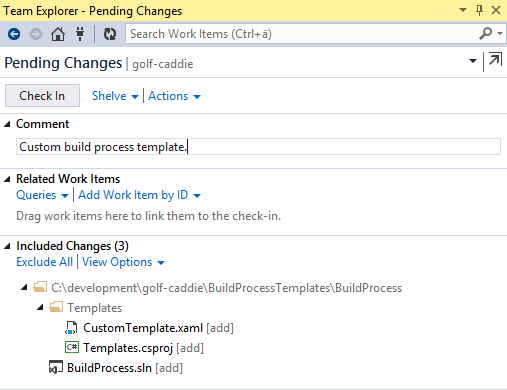
Commit the solution if you haven’t done so already.
Running the Build
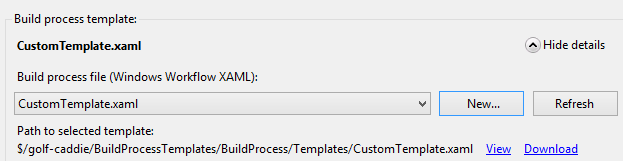
Now edit the build definition you want to run StyleCop for and use the custom template.
Trigger a new build and violá, you’ll probably have an unsuccessful build.
Personally I prefer using TeamCity with NAnt for the build process and JIRA for issue tracking, TFS is way behind imho, but the choice isn’t always up to me. ;-)
Cheers!