Posts

Choosing and Evaluating a UI library for Angular 2

In this screencast we evaluate if Kendo UI for Angular 2, more specifically if the Grid Component, fulfills the requirements to deliver a solution for a client.

Happy holidays and until next time, have an excellent day!

Angular 2.0.2 released – Guide on how to scaffold an app with Material2 using Angular CLI in minutes

Angular 2 is finally released and the tooling around it is maturing as well. In this screencast we use Angular CLI to scaffold an application from scratch, add routing to it and bootstrap material2 and finally steal the design from Jeremys sample app repo who’s on the material2 team. After recording this screencast I went ahead and upgraded the ng2play repo to the fully released version av angular2 (changelog 2.0.2).

Screencast

ng2 play @ github

As mentioned I decided to migrate the repo off screen since it would just be too messy and hard to follow along otherwise. For me it was actually easier to throw in my “old” components and services in a newly created application since a lot had changed, especially when moving to webpack.

Since we got inspired by Jeremys sample app we got two new themes in this screencast.

Light Theme

ng2light

Dark Theme

ng2dark

Material 2 Components Demo

I also decided to keep the material 2 components demo as a separate component in the app.
ng2material2

Sass Support

Since we’re using webpack now it’s super easy to compile sass files, all we needed to do was to add a line to angular-cli.json and restart the watch:

{
  "project": { ... },
  "apps": [
    {
      ...
      "styles": [
        "styles.css",
        "app-theme.scss"
      ],
      ...
    }
  ],
  "addons": [],
  "packages": [],
  "e2e": { ... },
  "test": { ... },
  "defaults": { ...}
}

Conclussion

Tooling is coming along really great with angular2 and in the screencast I scaffold an app according to best practices literally in matter of minutes, and the material2 team is producing some beautiful and well made components. Even though it’s nice to say that angular 2 is finally here it will be exciting to see what future versions of angular will bring us. They’ve just recently announced the versioning and releasing strategy for angular and may I say it’s pretty interesting.

Hope you’ve enjoyed the screencast, and as always have an excellent day!

Angular 2 RC 5 NgModules

Angular Modules, also known as NgModules, are the powerful new way to organize and bootstrap your Angular application. In this screencast we upgrade the ng2play repo to the latest release candidate (RC5).

Screencast

Links

Here are the links related to the screencast.

Migration Steps

We basically follow the migration steps in the guide, which are:

  1. Update to RC5: We do this by simply bumping the versions in packages.json and running npm install.
  2. Create an NgModule: Create a root NgModule in app.module.ts that we use to bootstrap our application.
  3. Update your bootstrap: Updated main.ts to bootstrap our module instead of our root component.
  4. Update your 3rd party libraries: We load up the Forms, Material, Router and Http module in our main app module.
  5. Cleanup: Clean up the code by getting rid of repetitive boiler plate code in our Component annotations.

Revisiting Forms

A couple of months ago I did a rant on forms in angular, and finally they are starting to adress some of the issues. For instance it wasn’t possible to reset a form and its validation in earlier versions, which now is possible. We can simply call a reset method on either a form group or a single control.

Conclusion

Modules is definitely something that we needed to be able to get rid of a lot of boiler plate code in our components. Even if my opinion is that it’s a bit late to introduce this in between two release candidates the end result weighs up for it. I’ll try to do a separate screen on lazy loading modules, which is really easy now.


Hope this screencast helped you migrate to RC5 and learn more about modules in Angular.
Until next time, have an excellent day!

Do’s and Don’ts when Using AspNet with Single Page Applications such as Angular, Aurelia or React

Discussion on do’s and don’ts when combining AspNet with Single Page Applications such as Angular, Aurelia or React. Main question: Should we separate frontend and backend into separate solutions or keep them together as the new AspNet template in VS2015 suggests?

Screencast

What’s your take on it? Agree or disagree? Let me know!

Until next time, have an excellent day!

Git Deploying a Bundled Angular 2 App using Angular CLI to Microsoft Azure

In this screencast I use the angular-cli tool for the first time to package an angular2 app for production before git deploying it to Microsoft Azure.

Screencast

Angular CLI

The CLI is at the moment of writing in beta and very much still a work in progress. It’s an excellent tool imho for scaffolding a new project, components and services. In this screencast we ran the following commands:

  ng new PROJECT_NAME // creates a new project
  ng g component COMPONENT_NAME // creates a new component
  ng g service SERVICE_NAME // creates a new service
  ng build -prod // builds a production ready version
  ng serve -prod // serves a production ready version

The CLI allows you to do a lot more, I really recommend you to install it and play with it for yourselves.

  npm install -g angular-cli

Also make sure to check out their official github repo which serves as great documentation.

Git Deployment

In this screencast we took a couple of short cuts, we didn’t setup a full CI environment. We initialized a new git repository in the dist folder and pushed only that folder to azure, meaning we built it on our dev machine, big NO NO. The workflow we want would look something like this instead.

  1. We commit a code change.
  2. Agent gets the latest code and builds it.
  3. Tests are run on build agent.
  4. If tests pass, deploy the dist folder to a staging slot.

Nevertheless we still need to enable a git repository for our web app, here’s an excellent guide on how to do that, it basically takes you through the steps I did in the screencast. Basically from the dist folder:

  1. git init
  2. git add *
  3. git commit -m “Initial Commit.”
  4. git remote add azure GIT_CLONE_URL
  5. git push azure master

These commands should fire up an authentication dialog and once you’ve provided the credentials the files should be pushed to the site.

Summary

With these steps we’ve managed to create a production build of an angular 2 app and deployed it to Azure. We did it all with just a few command lines using the angular CLI which was pretty awesome. The CLI does lagg behind the release candidates and is a work in progress so please use with caution.

Until next time, have an excellent day!

Angular 2 Upgrading to new 3.0 Router

In this episode we upgrade the ng2play repo to leverage the new 3.0 router and implement a route guard to protect components that require authentication. Here’s the entire changeset, not that bloody considering the changes but this is also a very small application.

Screencast

Defining Routes

With the old router we decorated our app component with the RouteConfig annotation to configure the routs.

  @Routes([		
    { path: '/', component: Todo },
    { path: '/about/:id', component: About },
    { path: '/profile', component: Profile}		
  ])
  export class AppComponent { ... }

With the new router the routing configuration is no longer bound to a specific component, instead we make it accessible as a provider by exporting it as a const from a separate routes.ts file. Another essential change is that we need to remove the forward slash in the beginning when defining the path.

  import { provideRouter, RouterConfig } from '@angular/router';

  export const appRoutes: RouterConfig = [
    { path: '', component: Todo },
    { path: 'about/:id', component: About },
    { path: 'profile', component: Profile }
  ];

  export const APP_ROUTER_PROVIDER = provideRouter(appRoutes);

Wich we can pass in to the bootstrap function in boot.ts instead of passing ROUTER_PROVIDERS as we did earlier.

import {APP_ROUTER_PROVIDER} from './routes';

bootstrap(AppComponent, [
  ...
  APP_ROUTER_PROVIDER,
  ...
]);

Route Parameters

A component that we route to can access information about route parameters, query parameters and URL fragments by something called, ActivatedRoute, which we can inject into the constructor. The key difference is that route parameters can be accessed through the params property as an Observable or by the snapshot property if subscribing for future changes is overkill. Here’s both ways in our about.ts component:

  import {Component, OnInit} from '@angular/core';
  import { ActivatedRoute } from '@angular/router';

  @Component({
    selector: 'about',
    template: `Welcome to the about page! This is the ID: {{id}}`
  })
  export class About implements OnInit {
    id: string;

    constructor(private route: ActivatedRoute) {}

    ngOnInit() {
      this.id = this.route.snapshot.params['id'];
      this.route.params
        .map(params => params['id'])
          .subscribe(id => {
            this.id = id;
        });
    }
  }

Guarding routes

Previously we could prevent our components from activating for unauthenticated users by using the @CanActivate and @CanDeactivate annotations. The guarding logic could be put inside a callback function:

import {CanActivate} from '@angular/router';
@Component({ ... })
@CanActivate(() => tokenNotExpired())
export class Profile { ... }

This approach suffered from that we don’t have access to the applications dependency injection and that we need to decorate each component class with it. The new router solves these problems, we can easily create an auth-guard injectable service that we can pass in to the route configuration accordingly:

  import { provideRouter, RouterConfig } from '@angular/router';
  import { AuthGuard} from './auth-guard';

  export const appRoutes: RouterConfig = [
    { path: '', component: Todo },
    { path: 'about/:id', component: About },
    { path: 'profile', component: Profile, canActivate: [AuthGuard] }
  ];

  export const APP_ROUTER_PROVIDER = provideRouter(appRoutes);

The auth guard has access to the applications dependency injection and we can redirect the user to the root component if they are not allowed to navigate to the component.

import {tokenNotExpired} from 'angular2-jwt';
import { Injectable } from '@angular/core';
import {
  CanActivate,
  ActivatedRouteSnapshot,
  RouterStateSnapshot,
  Router
} from '@angular/router';

@Injectable()
export class AuthGuard implements CanActivate {
  constructor(private router: Router) {}

  canActivate(next: ActivatedRouteSnapshot, state: RouterStateSnapshot) {
    if (tokenNotExpired()) {
      return true;
    }

    this.router.navigate(['']);
    return false;
  }
}

Let’s also not forget that we’ll need to pass the auth-guard to our bootstrap method to be able to resolve the dependency:

import {APP_ROUTER_PROVIDER} from './routes';
import {AuthGuard} from './auth-guard';

bootstrap(AppComponent, [
  ...
  APP_ROUTER_PROVIDER,
  AuthGuard
  ...
]);

Summary

With these steps we’ve managed to migrate our application to the new 3.0 router, quite frictionless seemingly, but imho they started calling angular2 for RC way too early. It’s still moving too much to even consider using this for production anytime soon.

Until next time, have an excellent day!

Getting Started with Angular2 RC1 and AspNet Core 1.0 RC2 using VisualStudio 2015 and Gulp

In this weeks screencast we start on a new page, to create a new angular2 and aspnet core seed project using the latest release candidate versions. My earlier series contains many upgrade from beta x to beta y episodes, even alphas, it’s starting to become messy to follow, hence the file new project. Make sure to star the project on github, available at https://github.com/ajtowf/aspnetcore-angular2-seed.

Screencast

Until next time, have an excellent day!

Upgrading to Angular 2 RC1 from beta – lessons learned

I recently upgraded my ng2 play repo from beta 15 to rc1 and I ran into a couple of things I thought would be nice to share since I’ve been getting quite a few mails about it.

angular2 -> @angular

To begin with all of the packages are now distributed under the @angular npm scope. This changes how Angular is installed via npm and how you import the code.

npm install --save @angular/core @angular/compiler @angular/common @angular/platform-browser @angular/platform-browser-dynamic rxjs@5.0.0-beta.6 zone.js@0.6.12

To import various symbols we needed to make the following adjustments:

  • angular2/core -> @angular/core
  • angular2/compiler -> @angular/compiler
  • angular2/common -> @angular/common
  • angular2/platform/browser -> @angular/platform-browser
  • angular2/platform/server -> @angular/platform-server
  • angular2/http -> @angular/http
  • new package: @angular/router replaces angular2/router with breaking changes

Loading with SystemJS

Instead of configuring and mapping libraries and modules in index.html we load the app a bit differently, see systemjs.config.js for details.

RxJS Deps

What isn’t mentioned in the angular2 changelog is that the RxJS version it uses has a new dependency to symbol-observable, make sure to install it.

npm install --save symbol-observable

and map it up in systemjs.config.js.

New Router (breaking changes)

In app.ts a couple of imports have moved, we now import LocationStrategy, HashLocationStrategy and Location from common instead of router:

import {LocationStrategy, HashLocationStrategy, Location} from 'angular2/router';
import {ROUTER_PROVIDERS, RouterOutlet, RouteConfig, RouterLink} from 'angular2/router';

became:

import {LocationStrategy, HashLocationStrategy, Location} from '@angular/common';
import {ROUTER_PROVIDERS, ROUTER_DIRECTIVES, Routes, Router} from '@angular/router';

and we only pass ROUTER_DIRECTIVES to the components directive instead of RouterOutlet and RouterLink. Furthermore, we configure our routes with the Routes-attribute instead of RouteConfig and there is no ‘as’ property, meaning:

@RouteConfig([
  { path: '/', component: Todo, as: 'Home' },
  { path: '/about/:id', component: About, as: 'About' },
  { path: '/profile', component: Profile, as: 'Profile' }
])

became:

@Routes([
  { path: '/', component: Todo },
  { path: '/about/:id', component: About },
  { path: '/profile', component: Profile }
])

Router Parameters and no CanActivate

Here we have quite a few changes if we take a look in about.ts instead of resolving the params in the constructor from the RouteParams class we now need to implement OnActivate and get it in the routerOnActivate-method.

import { Router, RouteSegment, OnActivate } from '@angular/router';
...
export class About implements OnActivate {
  ...
  routerOnActivate(current: RouteSegment) {
    this.id = current.getParam('id');
  }
}

and in the view we now pass parameters using the routerLink like this:

About

instead of the previous syntax which was a bit more cumbersome imho:

About

We could previously prevent the component from loading with the CanActiviate-attribute, but there is no equivalent for that yet, see profile.ts.

For more changes see the breaking changes docs.

Cannot find name ‘Promise’

If you’re targeting ES5 and want to prevent errors such as:

  • Cannot find name ‘Promise’
  • Cannot find name ‘Map’
  • Cannot find name ‘Set’

You’ll need to reference es6-shim at the top of your main typescript file, the file that boots the app if you will, in my case it’s boot.ts. (syntax highlighter messes up the brackets below)

/// 

To be able to do so you’ll need to run the following commands:

npm install -g typings
typings install es6-shim --ambient

before you can reference the es6-shim typescript definition file.

Final words

Cool, that was a lot of changes, let’s see if they keep down the breaking changes from now on at least. I can’t shake the feeling that a lot of people feel that things are a lot more complicated now. I haven’t been able to answer all the emails, I’ve been busy with some new cool customer projects.

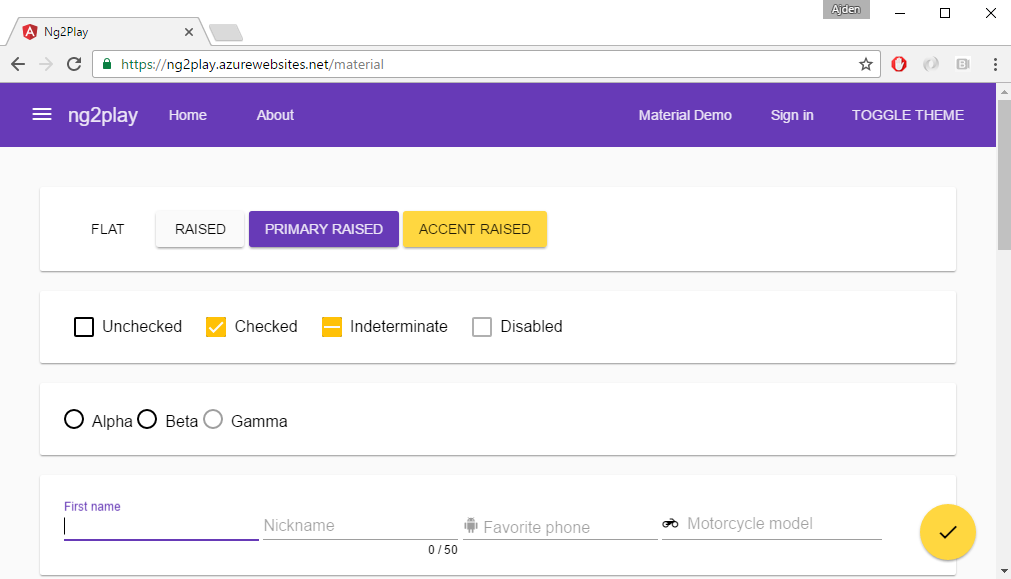
Upgrading material2 from alpha1 to alpha4 was seamless, I also cleaned up the loading in systemjs.config.js. Anyways make sure to star my ng2 play repo.

Until next time, have a nice day!

Angular 2 Material Replacing Bootstrap

In this weeks screencast we fully replace bootstrap with material components for angular 2. Material2 just announced their alpha 2 release, adding a bunch of components, perfect timing for live coding screencast, code at https://github.com/ajtowf/ng2_play. The ng2play repo has also been updated to the latest angular2 version which at the time of writing is beta 15, see the changelog for details.

During the coding session we integrate the following components into our app:

Make sure to check out the screencast below, enjoy!

Screencast

Documentation / Demo App

There isn’t any official documentation for material2 yet, but there is a demo app in their github repo, here are the steps to get it up and running on your local dev machine:

  1. Make sure you have `node` installed with a version at _least_ 4.2.3.
  2. Run `npm install -g angular-cli` to install the Angular CLI.
  3. Clone the angular/material2 repo
  4. From the root of the project, run `npm install`, then run `npm run typings` to install typescript definitions.
  5. To build the project, run `ng build`.
  6. To bring up a local server, run `ng serve`. This will automatically watch for changes and rebuild.

After the changes rebuild, the browser currently needs to be manually refreshed. Now you can visit the prompted URL in your browser to explore the demo app.

Resouces on Angular Material

To learn more about material deisgn and components for angular, make sure to check out my pluralsight course Angular Material Fundamentals.

Until next time, have a nice day folks and keep on coding!

Angular 2 Material First Look

In this weeks screencast we take a first look at the material components for angular2 that just released their first alpaha, code at https://github.com/ajtowf/ng2_play. We’ll integrate the button and checkbox component into our ng2play repo, the idea is to fully replace bootstrap down the road.

Screencast

Components

There will be breaking changes between alpha releases, first release of angular2-material includes the following components:

To learn more about material deisgn and components for angular, make sure to check out my pluralsight course Angular Material Fundamentals.

Until next time, have a nice day folks!