Why do we want to do this? Sometimes having to pay for commercial SSL certificates isn’t an option. By creating your own Root Certificate you can sign your own certificates to allow you to quickly and cheaply secure internal websites or applications that use SSL.
In this post we will
- Setup Cygwin and OpenSSL
- Generate a Root Certificate
- Deploy our Root Certificate Authority
- Create a Certificate Signing Request
- Generate a signed SSL certificate
- Deploy the SSL certificate to IIS
We’ll also test it from an android device by
- Deploying the CA certificate to the trust store
- Browse our webserver securly with no warnings
- Securly download resources from an app
Let’s get started!
Setting up the environment
Prerequisites
- Android SDK with an AVD running 4.x or a real device
- JDK 1.6.x or higher
- IntelliJ or your favorite editor
- IIS 7.x or higher
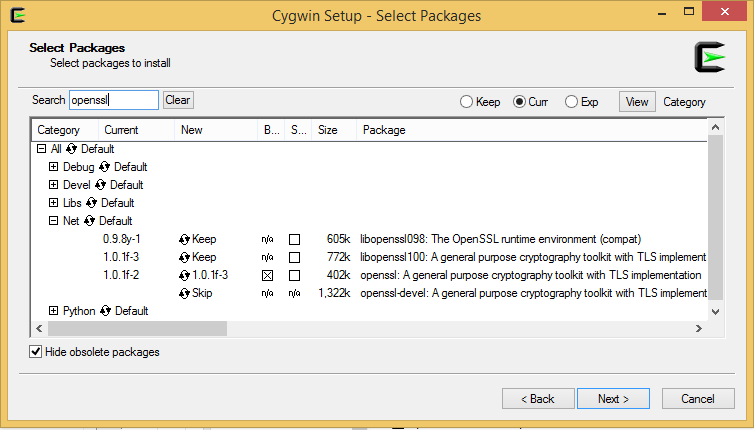
Install Cygwin and OpenSSL
Download
Cygwin and run the installer, make sure check the openssl packages.
Open C:\cygwin\usr\ssl\openssl.cnf and find the section beginning with [ CA_default ], edit it so it looks like this:
[ CA_default ]

dir             = /etc/ssl		# Where everything is kept
certs           = $dir/certs		# Where the issued certs are kept
crl_dir	        = $dir/crl		# Where the issued crl are kept
database        = $dir/CA/index.txt	# database index file.
#unique_subject = no			# Set to 'no' to allow creation of
					# several ctificates with same subject.
new_certs_dir   = $dir/newcerts		# default place for new certs.

certificate     = $dir/certs/cacert.pem 	# The CA certificate
serial          = $dir/CA/serial 		# The current serial number
crlnumber       = $dir/crlnumber	# the current crl number
					# must be commented out to leave a V1 CRL
crl             = $dir/crl.pem 		# The current CRL
private_key     = $dir/private/cakey.pem# The private key
RANDFILE        = $dir/private/.rand	# private random number file
Open a cygwin command shell and create the directories:
mkdir /etc/ssl/{CA,certs,crl,newcerts,private}
Create the certificate index file:
echo "01" > /etc/ssl/CA/serial
touch /etc/ssl/CA/index.txt
Generate the Root Certificate
We can now generate the Root Certificate with the following command:
openssl req -new -x509 -extensions v3_ca -keyout cakey.pem -out cacert.pem -days 3650
You’ll be asked to provide a private key – this password should be complex and kept secure as it will be needed to sign any future certificates. If someone was to get their hands on this they would be able to generate certificates in your name! You should have two files, cakey.pem which is your private key and cacert.pem which is the Root Certificate. Let’s move the certificate and the key to the correct folders.
mv cakey.pem /etc/ssl/private
mv cacert.pem /etc/ssl/certs
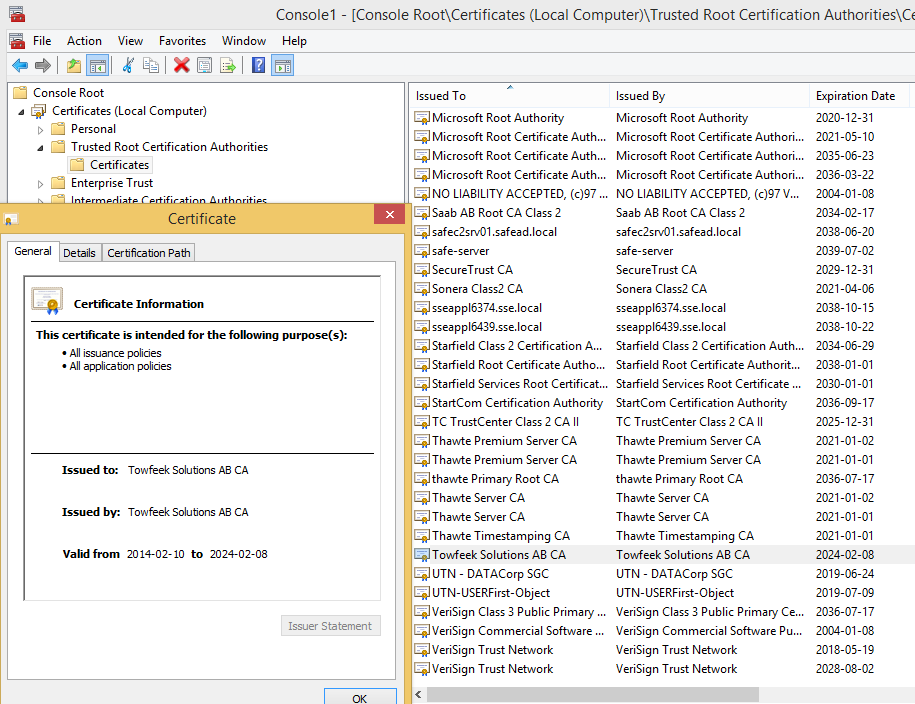
Trust our Root Certification Authority
Let’s add the root certificate to our trust store so we don’t get warnings from websites using a SSL certificate signed with our root certificate. The best way to do this is by deploying it through a group policy, I’ll add it manually since this is my dev machine.
- <windows> + R (Run) -> mmc <enter>
- Add the certificates snap-in <ctrl> + m, select Certificates and add snap-in for Computer account
- Expand Console Root -> Certificates -> Trusted Root Certification Authorities -> Certificates
- Right-click -> All Tasks -> Import… Select cacert.pem located in C:\cygwin\etc\ssl\certs
If you view the imported certificate it should look something like this:
Create a Self-Signed SSL Certificate
Now that we have successfully created a new Root Certificate we can use it to sign our own certificates. We need to create a Certificate Signing Request (CSR) before we can create a SSL certificate.
Generate the Certificate Signing Request
First create a Private Key that will be used during the certifcate signing process:
openssl genrsa -des3 -out server.key.secure 4096
Now that we have a Private Key we can use it to generate the Certificate Signing Request, this is the file that you would normally send to a Certificate Authority to generate a certificate. This will ask for the password for your private key as well as various details. When asked for the Common Name (CN) enter the domain name that the SSL certificate will be used for. You can enter the IP address of the server but many hostname verifiers on various devices won’t accept this, more specifically the DownloadManager in Android won’t accept it.
openssl req -new -key server.key.secure -out server.csr
Generate a signed SSL certificate
Now we have a CSR that we can generate a signed SSL certificate from:
openssl ca -in server.csr
Confirm the passphrase and answer yes to both signing the certificate and commiting it to the database and you should be able to find a new file in C:\cygwin\etc\ssl\newcerts, the file will probably be called 01.pem and this is your SSL Certificate.
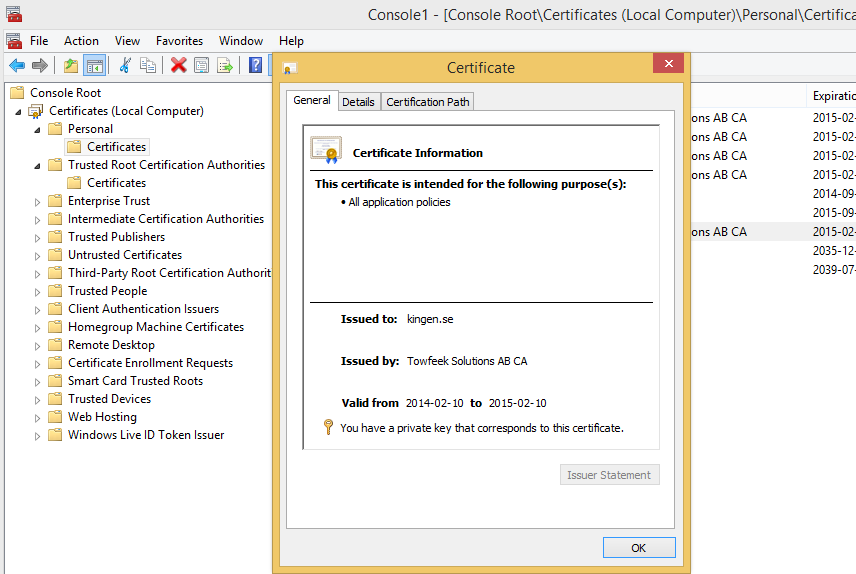
Create a pkcs12 file to import in Personal Certificate Store
Before deploying it we need to do one more thing. If we tried to use this with the private key we created earlier IIS would ask us to confirm our private key passphrase each time it started. To avoid this we should take our private key and create an insecure version of it, this will allow IIS to load your SSL certificate without needing the passphrase.
The downside is that anyone who gets a copy of your insecure key can use it to impersonate your SSL certificate, therefore it’s important to secure the folder it’s stored in.
openssl pkcs12 -export -in <pem-file-from-previous-step> -inkey server.key.secure -out cert.p12
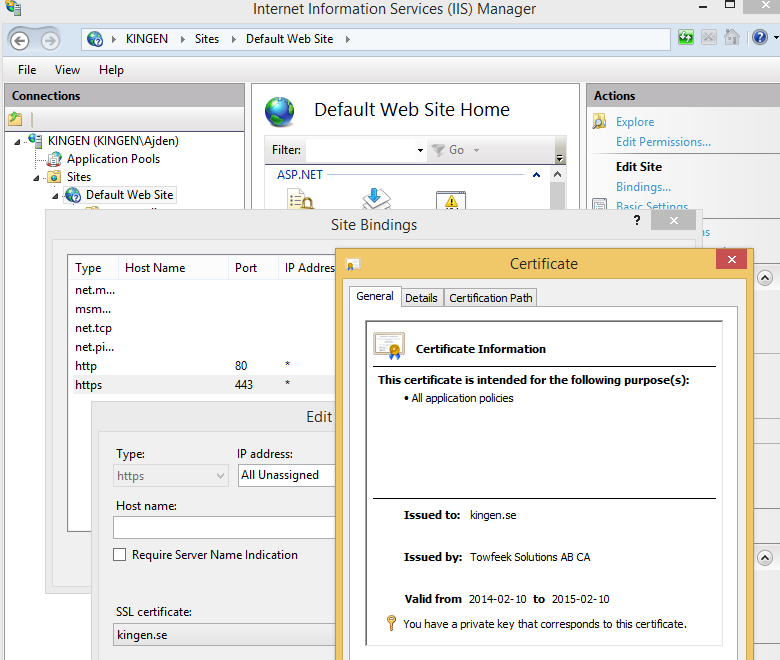
Deploy the SSL Certificate to IIS
Open the Management Console again but this time import the pk12-file to Certificates -> Personal -> Certificates, it should look something likes this:
Bind the SSL certificate to port 443 on your Default Web Site in IIS.
- Open IIS Manager (<windows> + R -> inetmgr)
- Select Default Web Site
- Click on Bindings under Actions
- Edit the https binding and set the SSL Certificate
When you’re done it should look something like this:
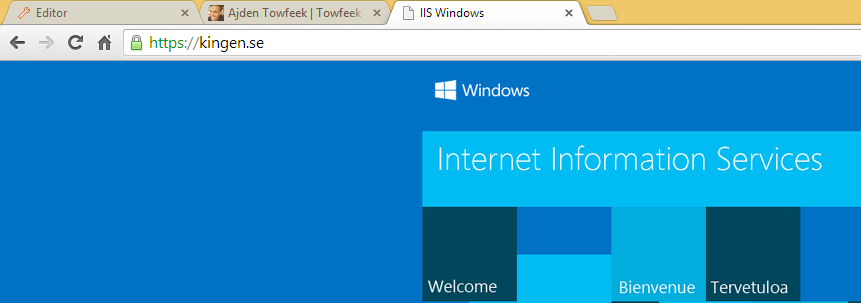
And if everything is done correctly you shouldn’t get any warnings when browsing your site.
Edit your hosts file to use any hostname you want on your machine
As I mentioned earlier all devices/browsers don’t trust certificates issued to an IP address. Add a record to your C:\Windows\System32\drivers\ets\hosts to resolve any hostname you want to 127.0.0.1.
127.0.0.1       kingen.se
127.0.0.1       facebook.com
And you’re all set! Now let’s access our server via HTTPS from an android device.
Install CA Root Certificate on Android
Pre Ice Cream Sandwich (Android 4.0) there was no way to add a new CA to the trust store, so we built our own custom keystores which we loaded in from code in our applications. The process was quite cumbersome! Now we can simply push the certificate to our phone using adb and install it.
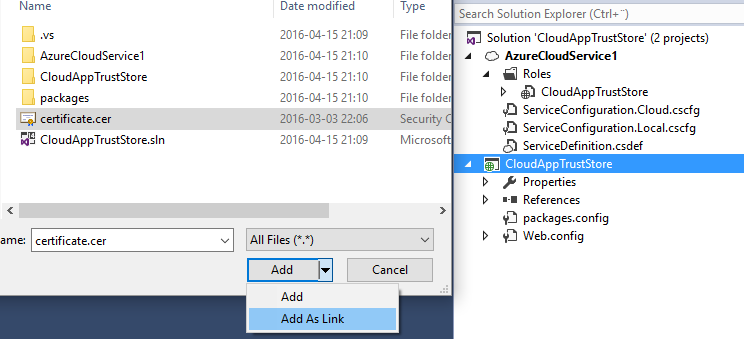
First we need to export the Root Certificate from the Management Console as a DER encoded binary since android can’t install pem-files.
- Right-click on Console Root -> Certificates -> Trusted Root Certification Authorities -> Certificates -> <your Root Certificate>
- Select All Tasks -> Export…, DER encoded binary, and save it somewhere.
Now let’s install it on a device or emulator, the steps are the same.
- adb push <your.cer-file> /sdcard/.
- Enter Settings -> Security -> Install from device storage on your Android device
- Press Ok and Confirm your PIN
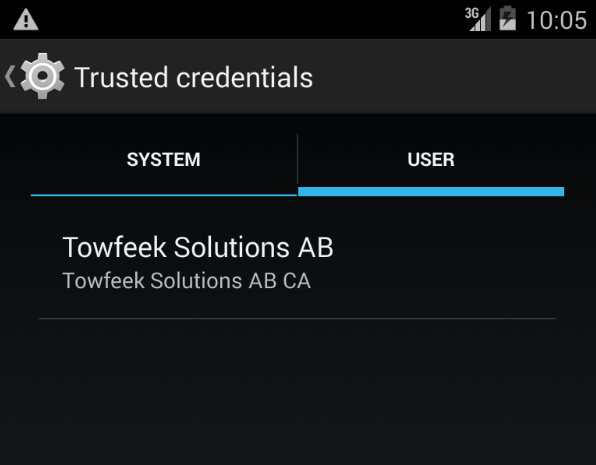
Your Trusted Credentials Store should now display your Root Certificate:
Before navigating to your machine from a browser we must make sure that our selected hostname resolves to our machine on the device. In the emulator it’s quite easy but to modify the hosts file on a real device you need root access.
Modifying the hosts file
We want the device or emulator to resolve the hostname we issued the SSL certificate for to your machine. Basically the same thing that we did for windows.
Update the /etc/hosts on the emulator
- adb pull /etc/hosts
- <add record to your machine with notepad>
- adb remount
- adb push <modified-file> /system/etc/hosts
Update /etc/hosts on an actuall device (requires root access)
- adb pull /etc/hosts
- <add record to your machine with notepad>
- adb shell
- su
- mount -o rw,remount -t yaffs2 /dev/block/mtdblock3 /system
- chmod 0326 /system/etc/hosts
- exit
- adb push <modified-file> /system/etc/hosts
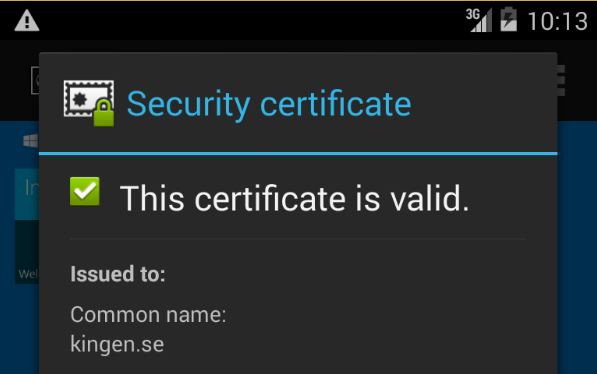
Verify that our server is trusted
Finally we can open up any browser we like and navigate to our server and we shouldn’t get any warnings for our self-signed SSL certificate.
Any app that fetches data from our server can now do it securly over HTTPS without the need of loading a custom keystore since the server is trusted.
Let’s verify this with a simple app that downloads an image with the DownloadManager.
Securly download an image
The code is very straightforward and needs no deeper explaination, we simply request to get an image from the server over HTTPS via the DownloadManager and expect it to work. Download the
full source code (14.8KB) for the sample app if you like but it aint much for the world.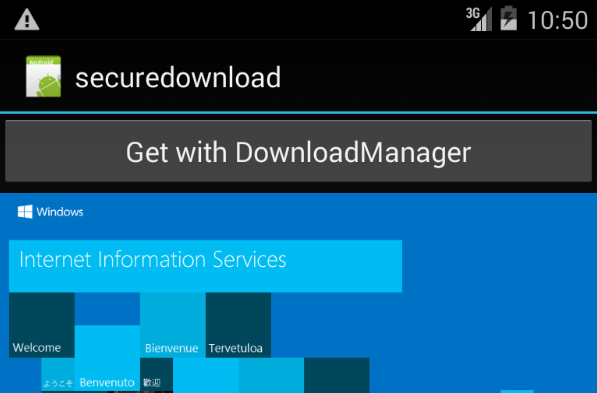
Final words
There are quite many steps to get this to work and there aren’t many guides out there covering the full example so I figured I share my experience, since sharing is caring ;-) Almost all apps today fetch some kind of data and we should concider doing it in a secure manner as often as possible. Sadly when you browse the forums really bad and unsecure suggestions are marked as the accepted answer. It’s kind of scary when you think of that developers like the one below might have coded some app or software that you’re using.
I’ve found a very easy solution for this:
request = new DownloadManager.Request(sourceUrl.replace(“https://”, “http://”))
Surprisingly worked for all https URLs that I tried. I’m not sure about the https security, but there is no exception and file gets downloaded properly
Anyways, I hope this helps someone out!